A thermal scope allows you to have a clear vision through thick bushes and dense fog. Therefore, it makes a great investment whenever you think of going out for an adventure at any given weather condition. However, for you to enjoy such benefits, then you must learn how to sight in a thermal Scope for absolute clarity effectively.
Sighting in a thermal scope is a process that involves aligning the barrel of the weapon with the device. When you sight properly, you also get the ability to hit your target quite easily. However, if you are new to thermal scopes, then you need to pay close attention to this blog. Here you will learn easy steps on how to sight your scope at home.
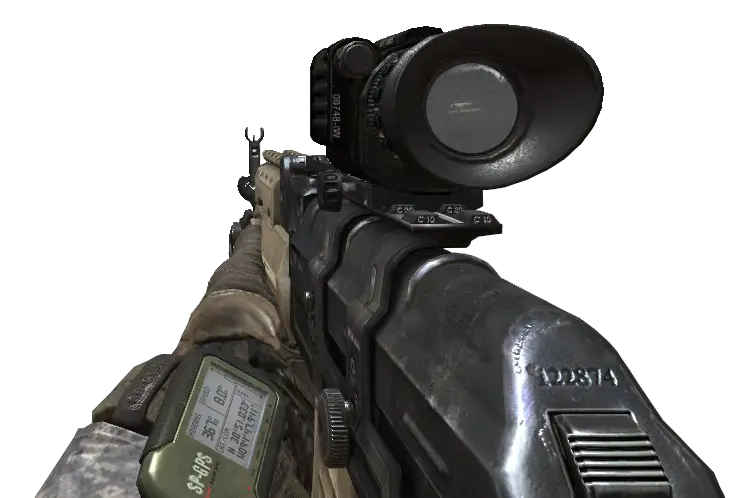
How to Sight In a Thermal Scope
Preparations
Preparations mean you get all the necessary tools you will need for the job-ready. You will need the thermal scope, your rifle, ammunition, and of cause the field where you will be sighting. Additionally, sighting a thermal scope is not the same as sighting regular scopes. Therefore, you will need to invest a little more if you expect to get quality results.
Thermal scopes only see through heated pads. So, you will need to invest in such items that will facilitate the required heating for you to see the object on the other end. This means you will need water bottles, reflecting tapes, or hand warmers to act as heating pads. However, if you have the money and do not have time, you can always shop for heating pads at your nearest weapon store.
Steps on how to Sight in a Thermal Scope
Step 1 : Stabilize Your Rifle
For you to sight your thermal scope perfectly, you need to ensure that your weapon is secure and stable. Whenever your gun is not stable, even after ensuring that you follow the right steps, you are not guaranteed if hitting your target leave alone getting the bullseye.
With an unstable rifle, even measuring the distance between where your bullet lands and the bullseye is also difficult. Therefore, even if you spend the whole day sighting, it will all be a waste of time as you will not get the results you are looking for.
Therefore, before you get started in sighting, ensure to invest in the right equipment to keep your rifle stable. If your hunting ground is secure, getting a tripod or bipod would make a great investment. However, if you don’t have the funds to support this, you can always secure your rifle using heavy bags on one end.
Once you are guaranteed that your rifle is secure, then you can effectively start to zeroing your thermal scope. A stable weapon also guarantees that you can hit your target at any distance.
Step 2: Check What Targets To Use
Using the right targets makes it possible for you to sight your scope. There are two easy ways of getting the right target; you can choose to make your targets or source from the local store. However, regardless of the method you choose, the main objective is to ensure you can keep your object cooler or warmer than the surrounding area. There is also a need to understand why do you need a thermal imaging scope?
Setting your target with distinct heat makes it possible for you to zero your scope without many complications. The secret behind this technique is that when the temperature of the heating pads contrasts, the object on the other end will provide a clear view of the target. Therefore, it will be easy for you to hit the target with minimal adjustments on the scope.
You can use reflective tape or water bottles to create a cross target that will give you a center point. However, if you don’t have the time to create your center point, you can purchase the necessary heated target for your rifle. But, you have to ensure that you get the target from a trusted company to enhance your chances of sighting.
Step 3 :Check Your Target Distance
When sighting, working with your ideal distance is quite essential. For instance, if you intend to shoot at an object placed within a 100-yard range, then when sighting, ensure to use the same distance. When sighting, using the same distance recommendation guarantees that you don’t have to keep adjusting your scope when you get to the actual field of action.
Although the recommended distance for target shooting ranges between 50 and 200 yards, sighting at a closer distance isn’t a weakness. Regardless of your skills as a shooter, when you sight at a closer range, you always have the option of hitting the reticle either an inch high or low.
Additionally, it is essential for you to use the same ammunition rounds for both target shooting and hunting. The bullet drops vary according to bullet weight, velocity, and the caliber you are using. Therefore, when you use different ammunition for target shooting then use another for hunting, your results will automatically vary.
To avoid the frustration that comes with this, you need to invest in the same ammunition for your rifle. This way, your bullets will have the same weight and will go through the same velocity when you fire.
Step 4: Practice Round
For you to be completely sure that your rifle is ready and the sighting is perfect, you need to go through a practice round. The practice round is quite different from when you were sight. At this point, you will require to set your target as if on an actual hunting adventure.
Load your rifle with the appropriate ammunition, identify a stable position for you to maximize your zero. When practicing, you don’t expect to hit the target with the first few shots. However, this will help you determine how close or far you are from getting the bullseye.
Therefore, start with firing at least three rounds to your target. Measure the results to get an approximation of your shot towards the target, both horizontal and vertical distances. Write every measurement down for easy adjustment were necessary on the thermal optic.
However, when you are shooting off target, this is when you will require to adjust the settings. But, if you get the target where you hit the bullseye or not, you don’t have to keep zeroing your scope
Step 5 :Make Adjustments
Every thermal optic comes with adjusting mechanisms to help you adjust the optics. Therefore, whenever you fire your practice rounds, use this to make necessary adjustments depending on your findings after every shot.
When adjusting, you have to ensure that you keep your firing patterns, distances, and positions consistent. This will help you to adjust easily and get the bullseye spot on the target. Therefore, ensure to get every reading accurately, and when adjusting, make sure you don’t overdo it on either side. Remember, each brand is different, and there is no one accurate adjusting procedure for all thermal scopes. Therefore, always refer to the manufactures manual for the right adjusting procedure.
Final Thoughts
Using a thermal scope for your hunting adventure increases your chances of hitting your target with every shot. However, you will require to ensure that your scope and rifle are a perfect fit, and they blend in together conveniently.
Additionally, if you are a first-time hunter, the process of sighting the scope could be quite a challenge. Therefore, if possible, you can find an expert hunter who has the sighting skills to help you with sighting. This way, you will not only learn from the best you will also get the basics of sighting.
Lastly, if you choose to do it yourself, ensure to invest in the right equipment and follow each step effectively. Sighting your thermal scope by yourself guarantees that you can save a considerable amount of money as well as enhances your skills. Once you are satisfied with your sighting, ensure to store thermal scope at a secure place. This will minimize your needs to sight whenever you are going out for hunting.